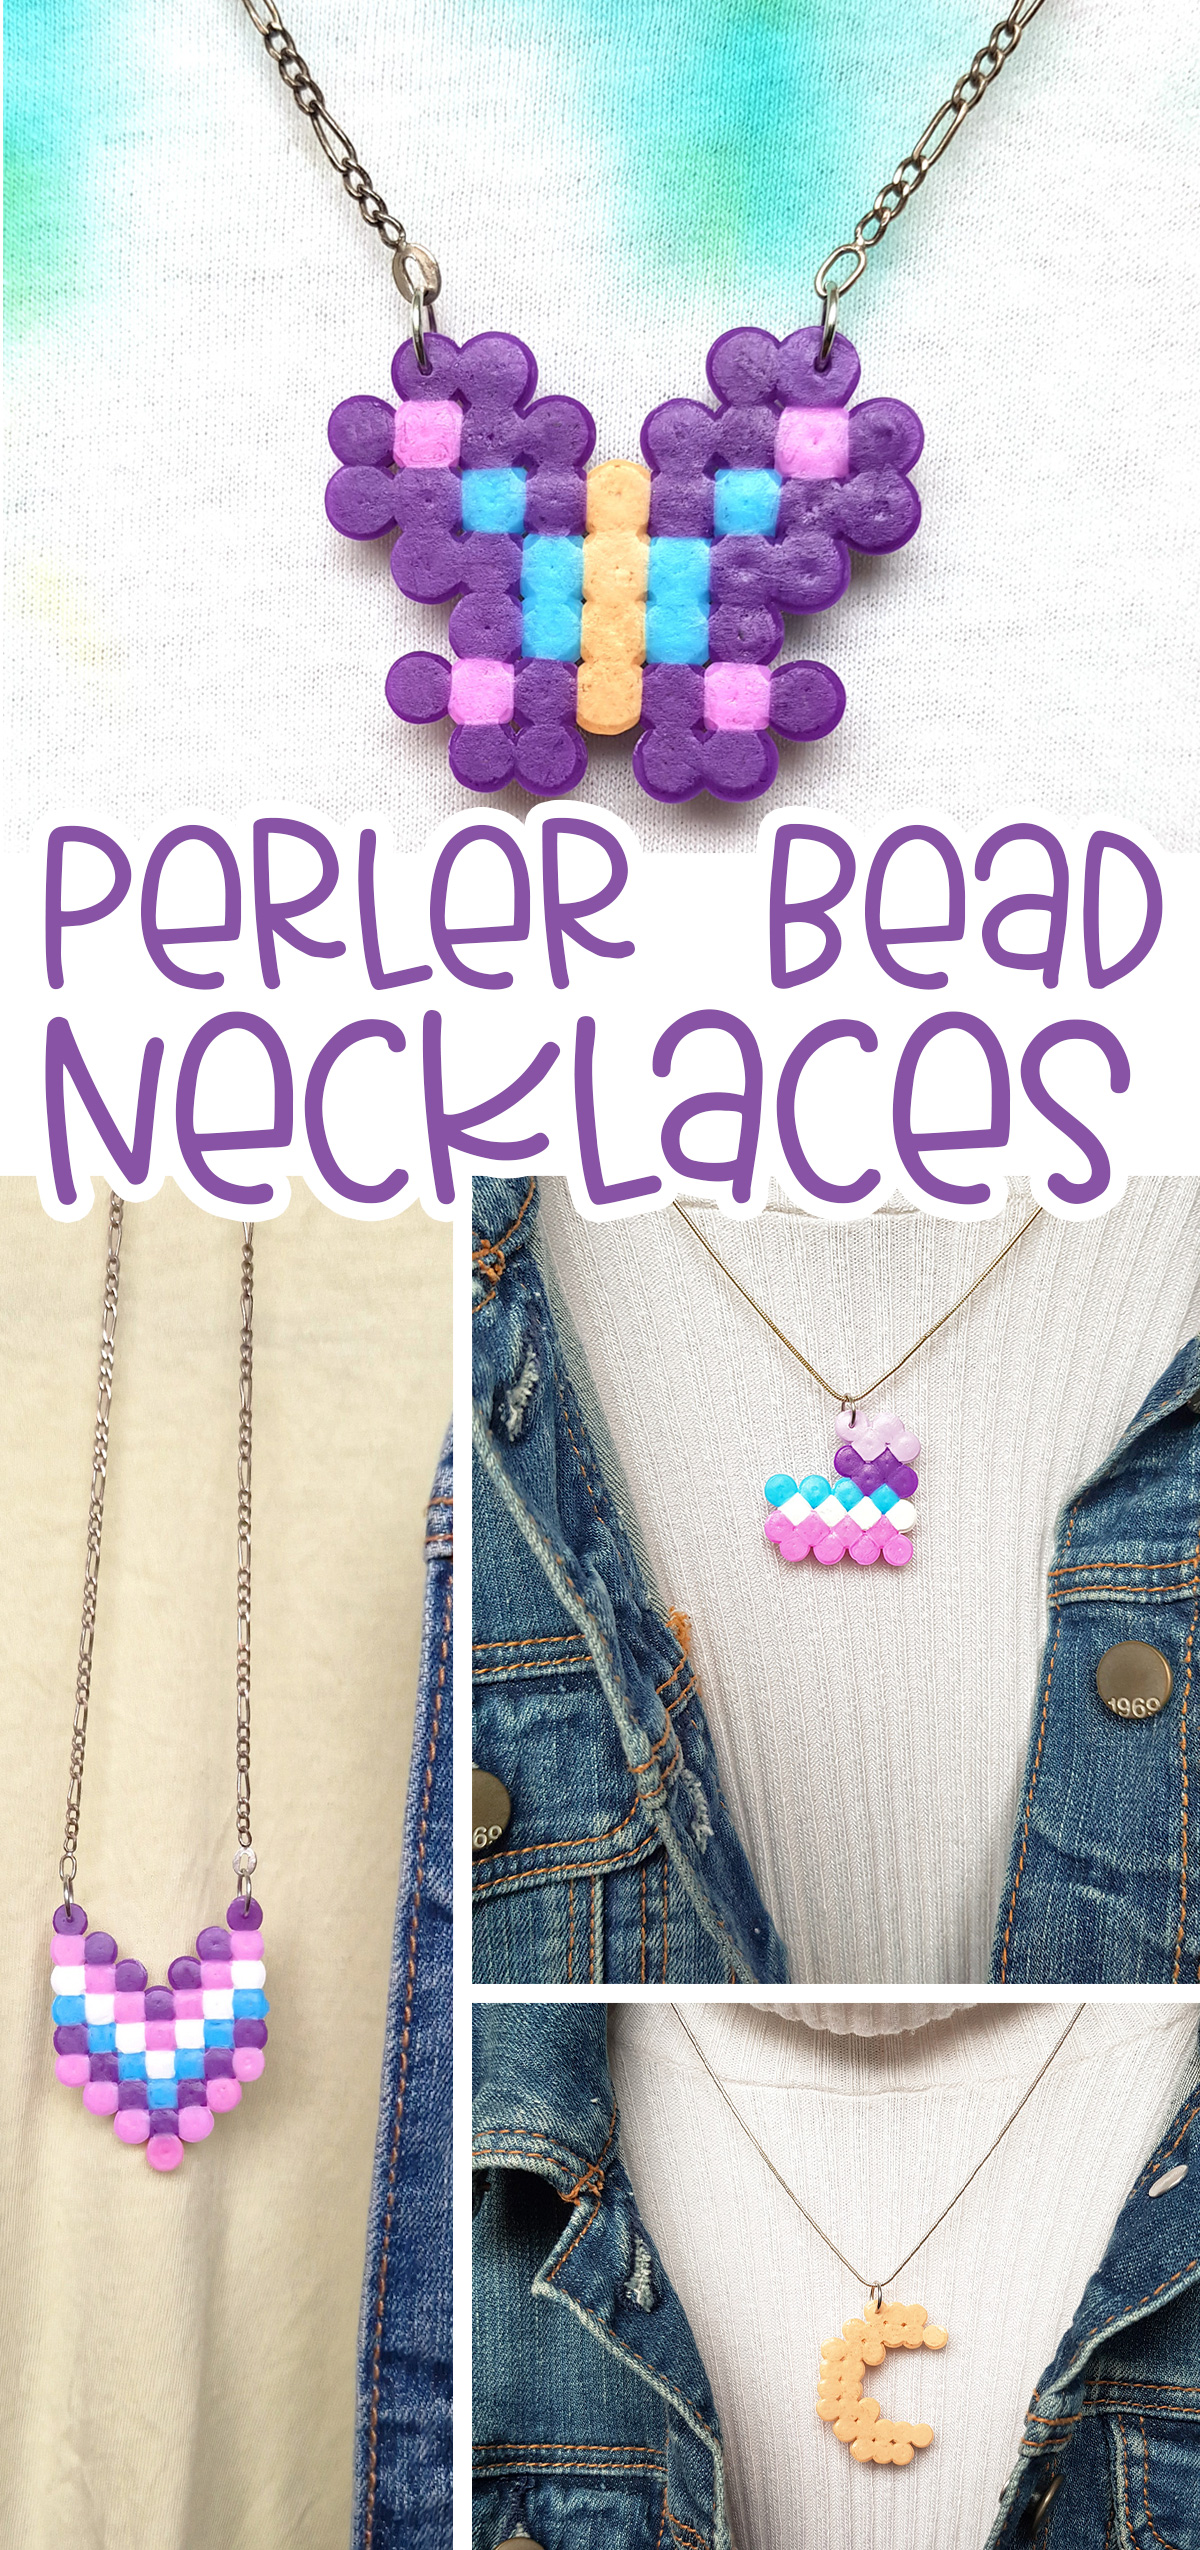
Perler Bead Necklace
Create the cutest DIY necklace for yourself or a friend with this Perler bead necklace tutorial. When you’re done, check out these fuse bead keychains. This post contains affiliate links.
Welcome to a new series of jewelry and accessories you can make with Perler beads!
Perler beads, also known as fuse beads, are so much fun for kids of all ages. You arrange the beads on a pegboard, and then use an iron or heat press to melt them together. When it cools, you can use the design as a base for all kinds of projects – and that’s what this series is all about!
We’re going to start with necklaces – the method is basic and will serve as a springboard for future projects, and the necklace pendant designs can be used for different types of creations as well.
For example, you can use a glue gun to attach a pin to the back of a design and use it as a brooch or button instead of a necklace charm. Or you can glue a magnet to the back and hang it on a fridge or locker. You can even hang one from a keychain instead of a necklace chain, using the same method.
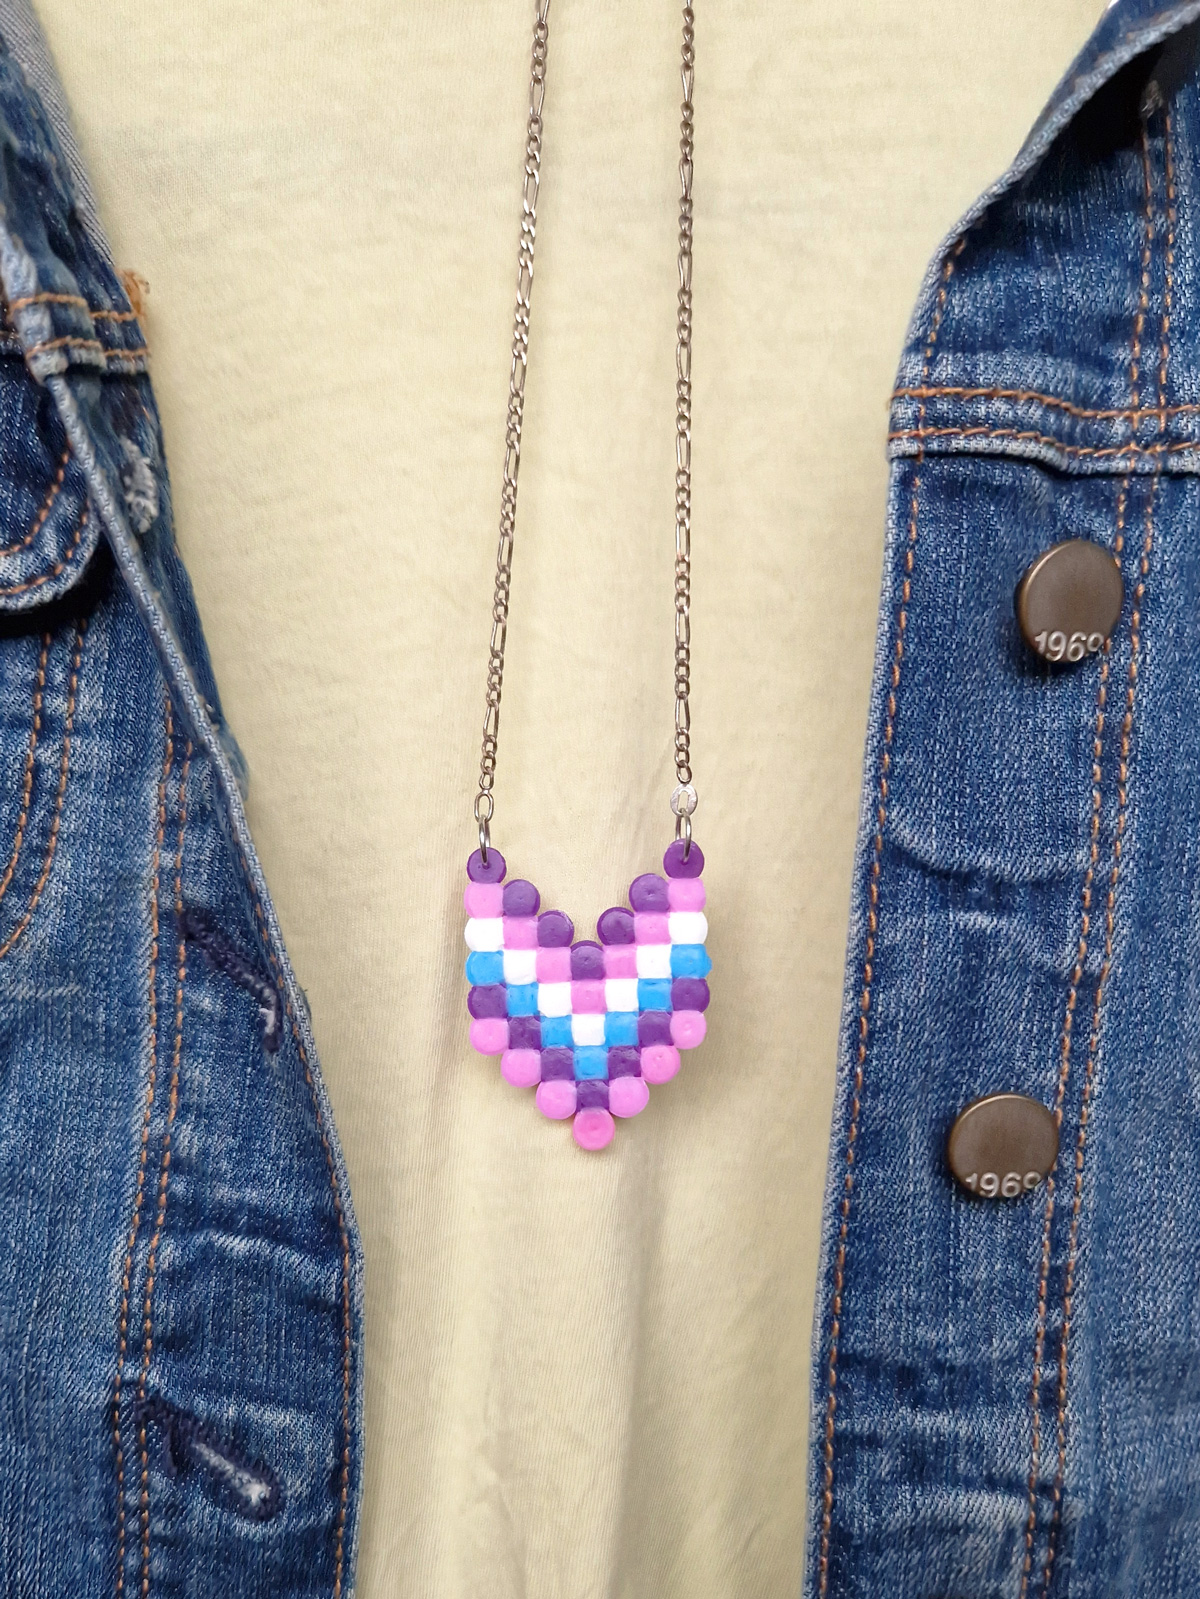
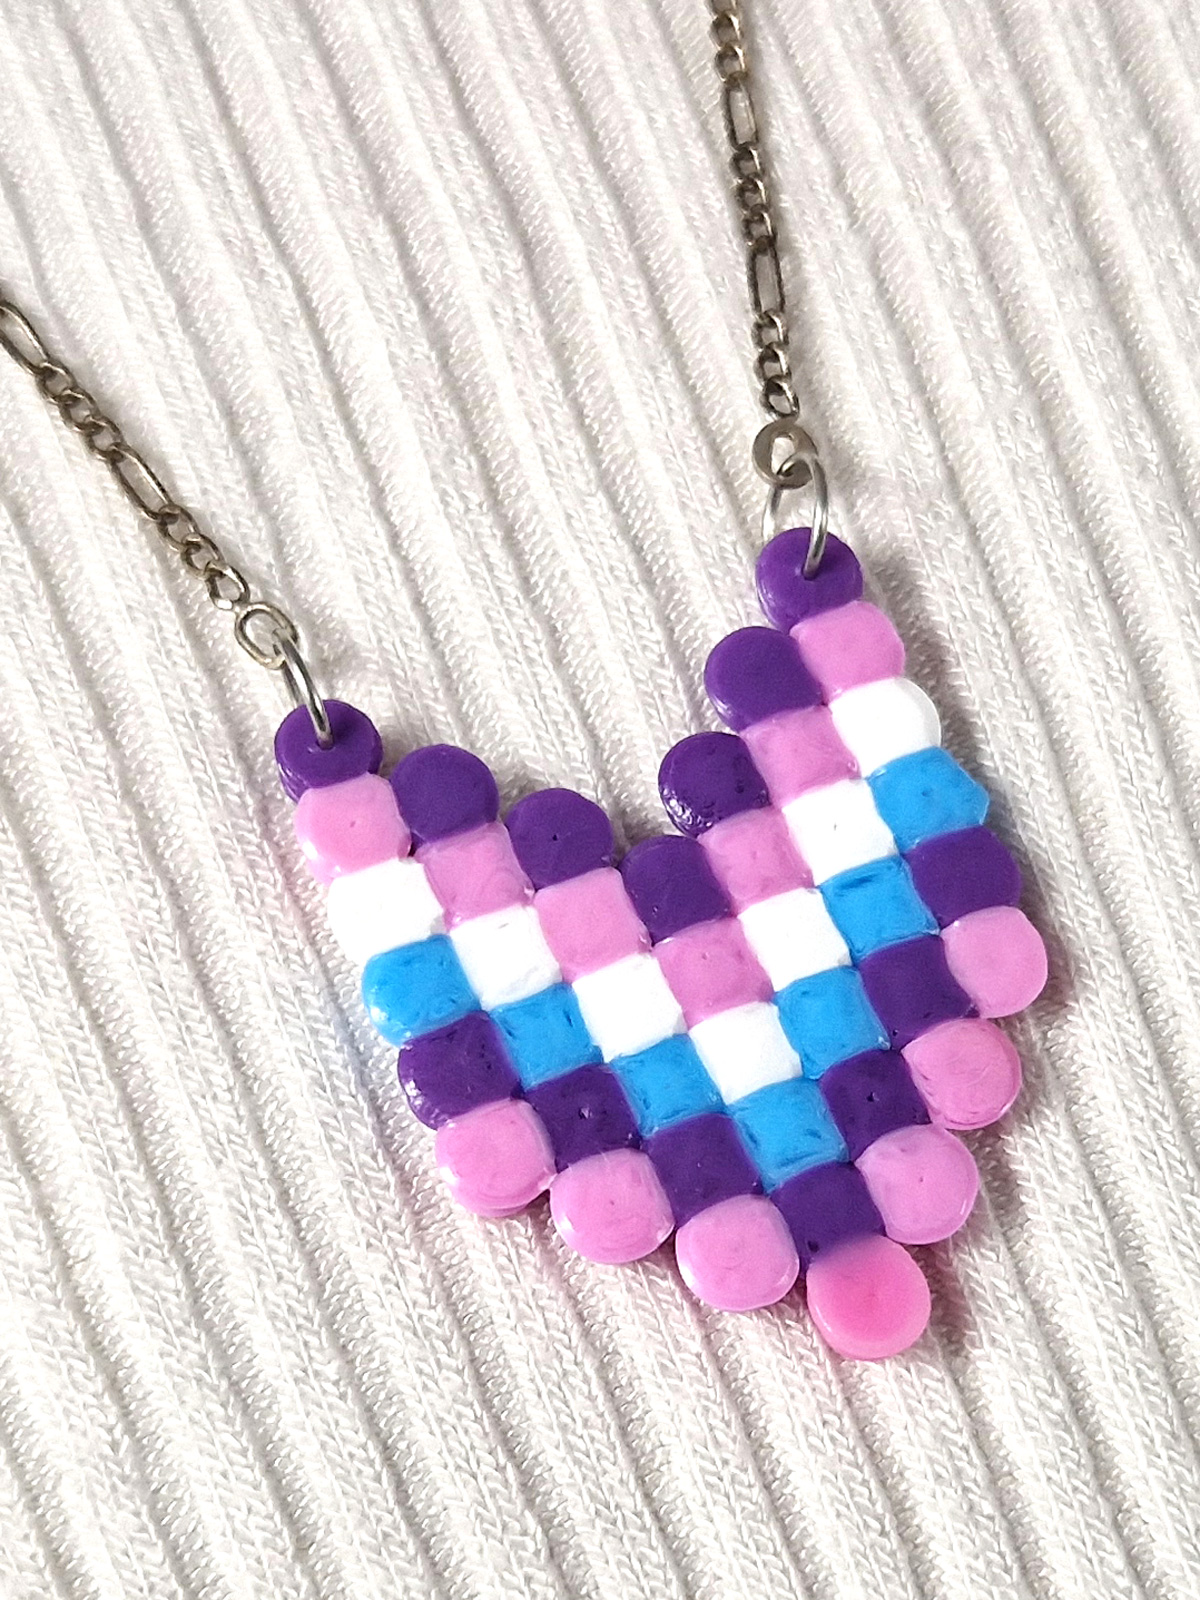
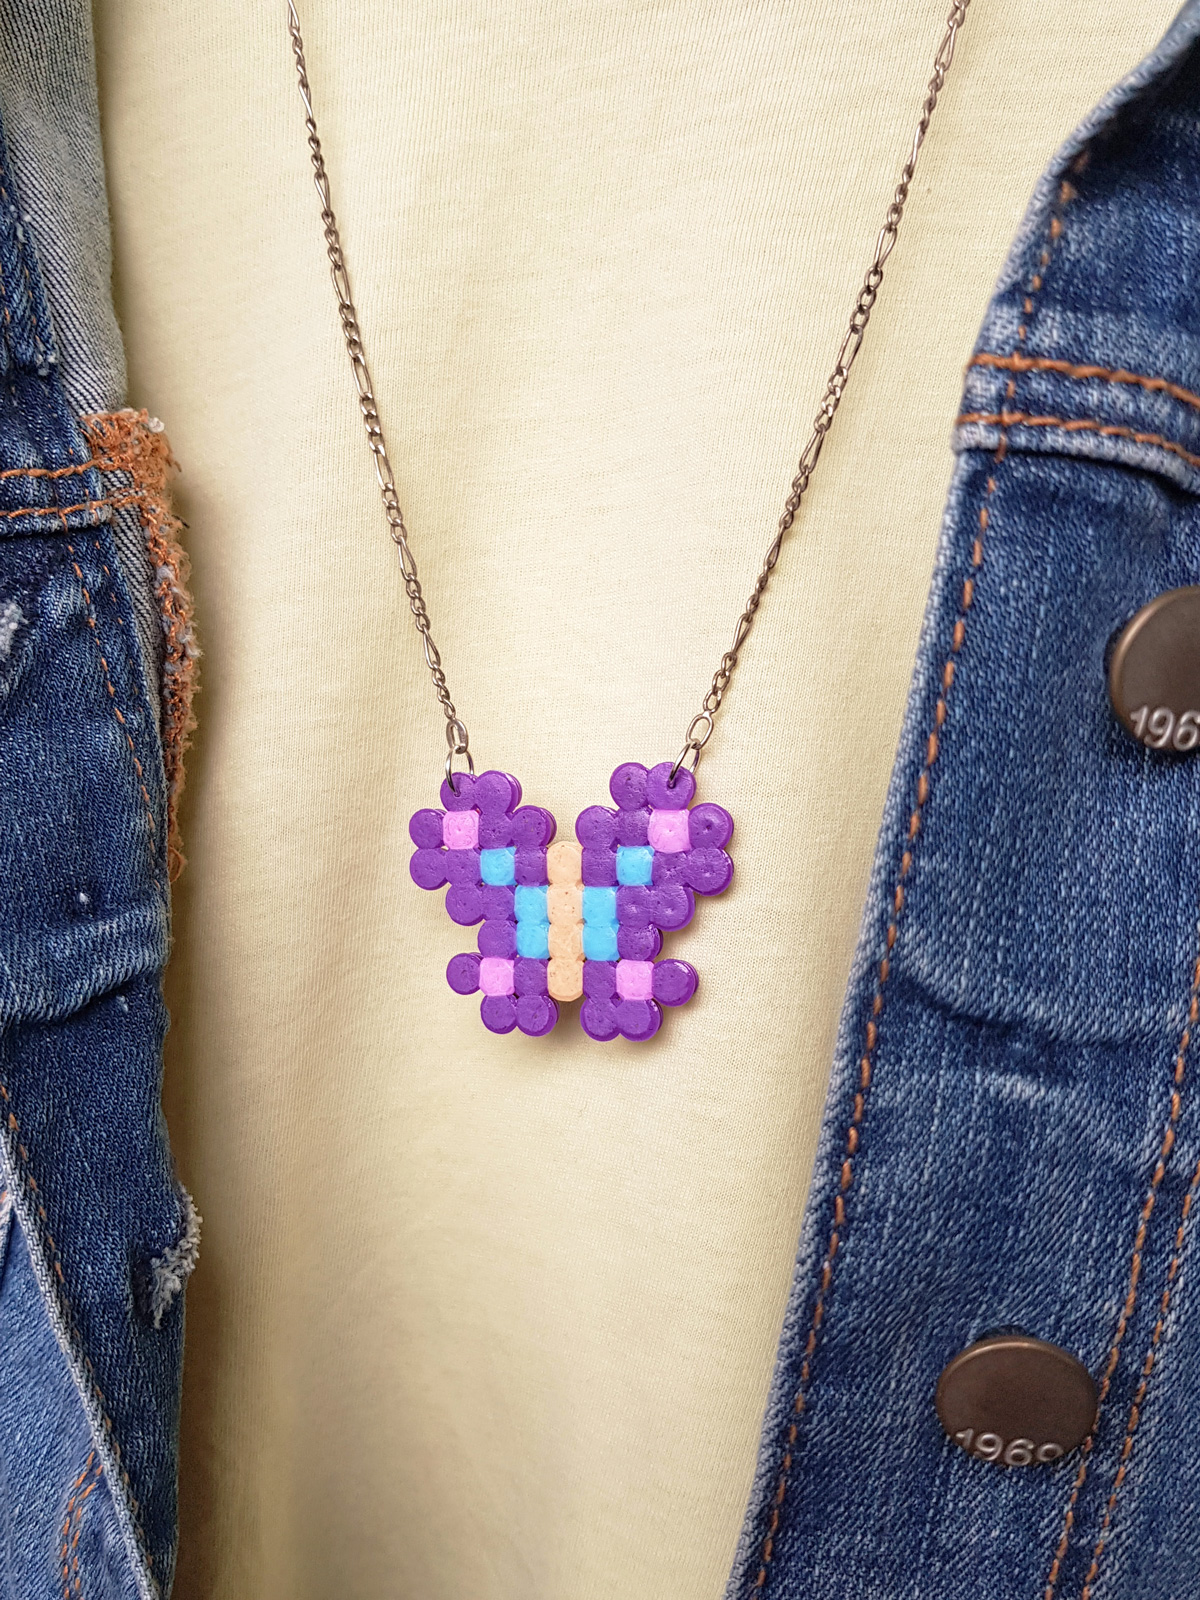
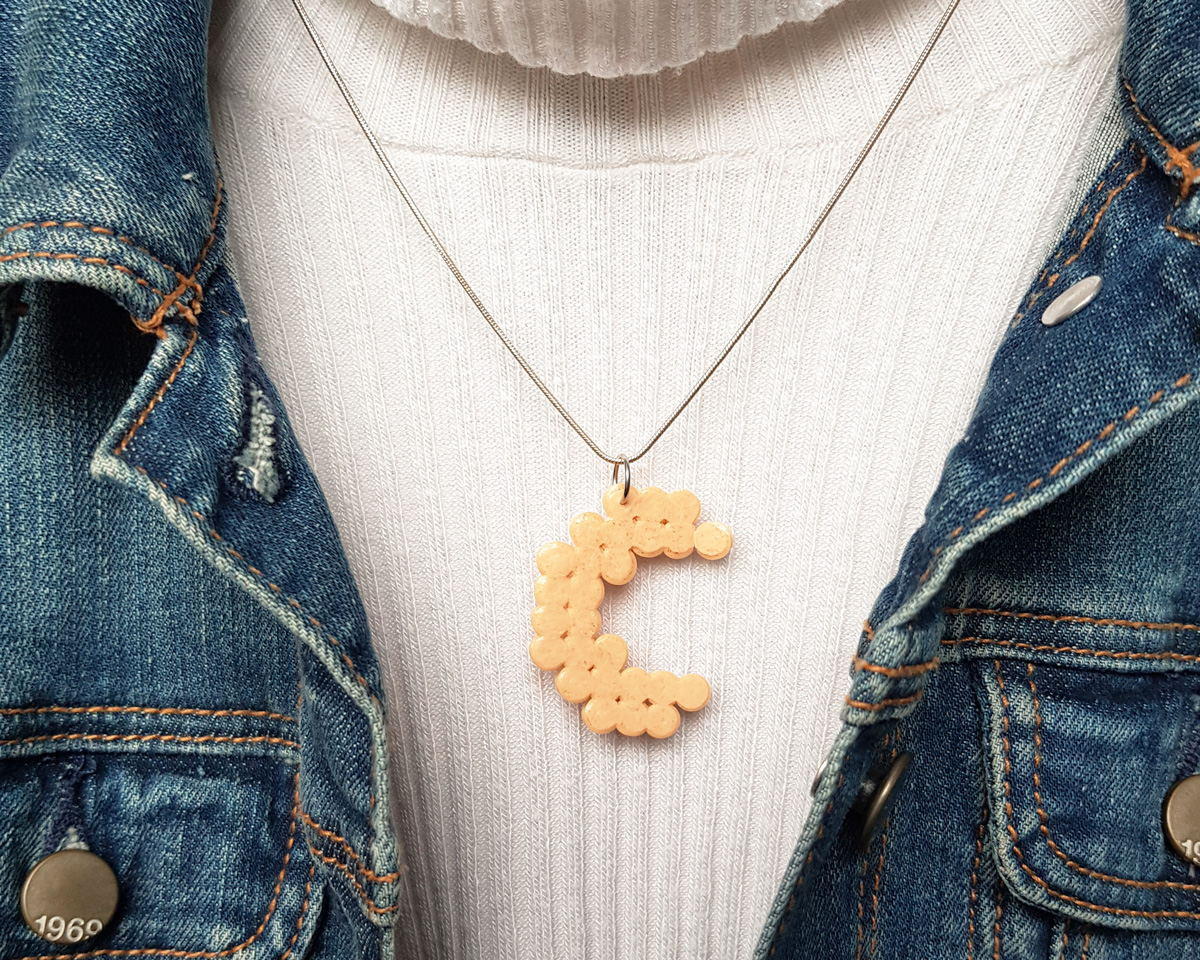
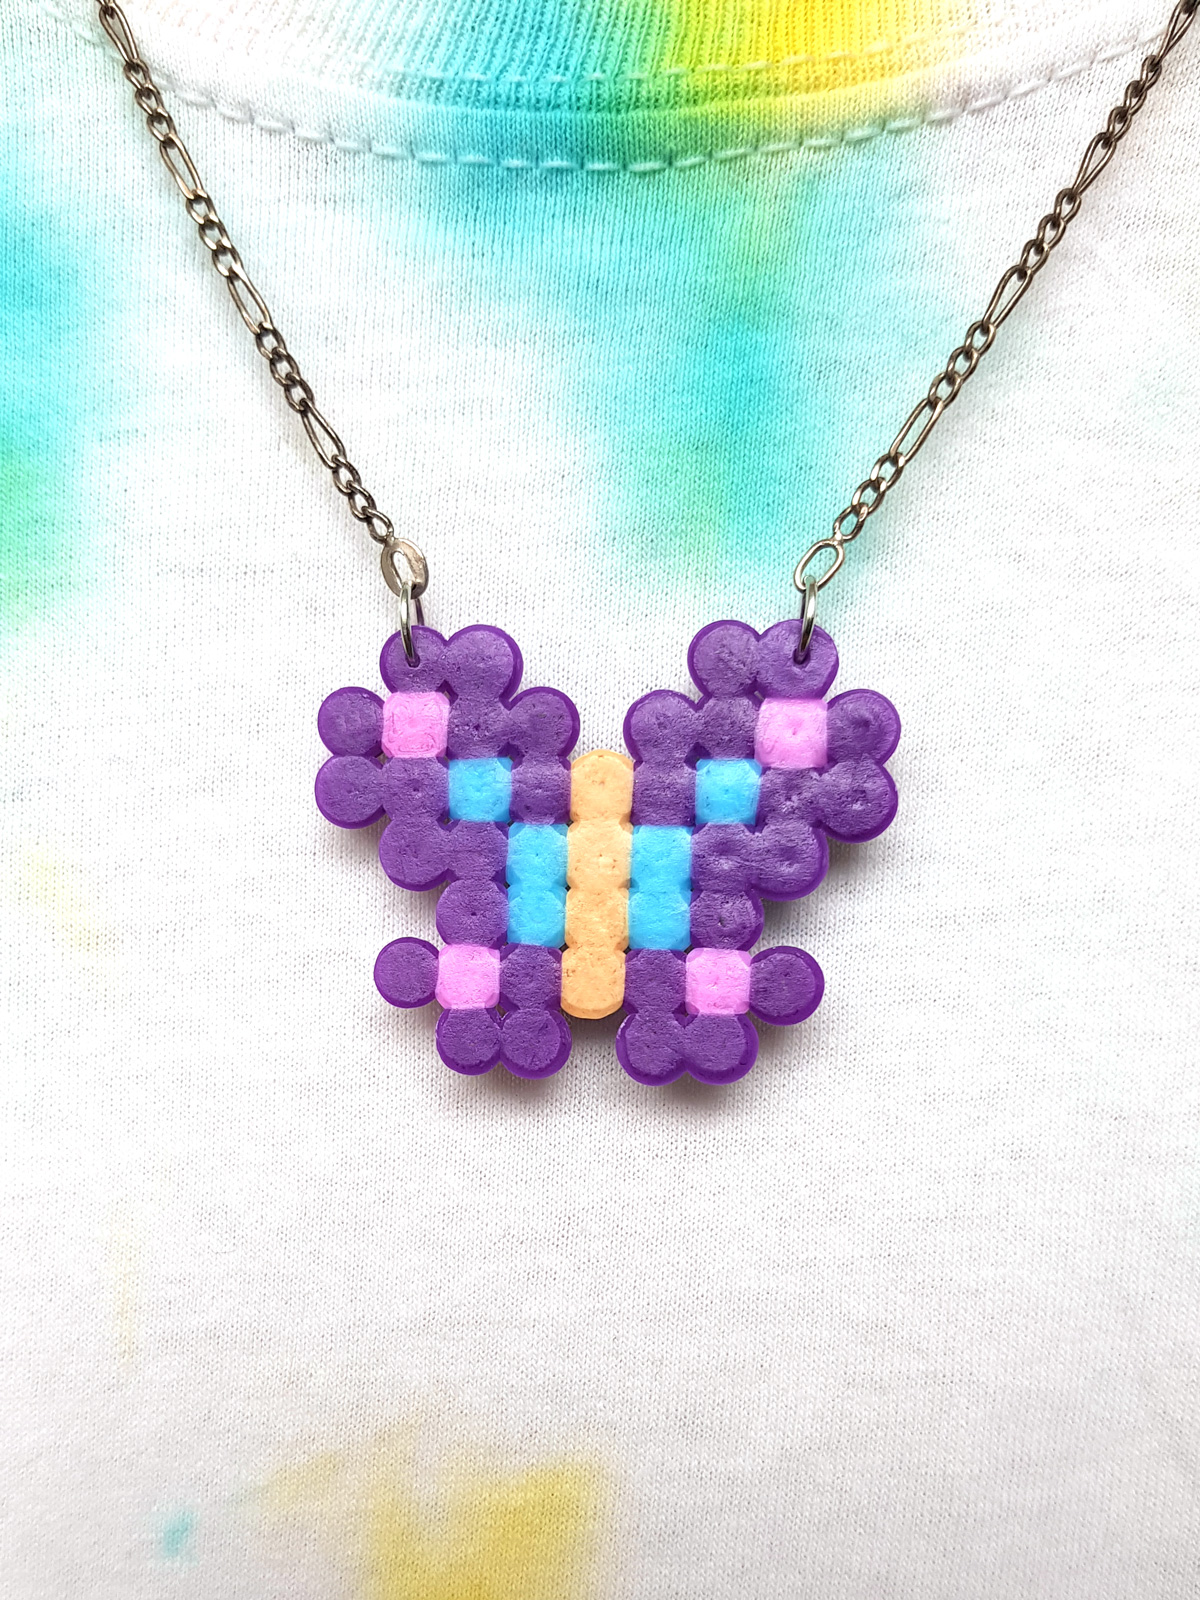
We’ve provided you with a few patterns to start with – flower, moon, heart, chevron, and butterfly – in pretty pastel colors. But as always, this is just a starting suggestion and you should definitely use your own taste and imagination. For example, you can keep the pattern but substitute colors that you prefer or that match your outfits.

You can also alter the look of the necklace by choosing what kind of chain or string to hang it from. A metallic chain will have a whole different vibe than a leather (or vegan/faux leather) cord. Colorful cords or jewelry wire are also options to consider.
These necklaces look great on their own, but if you stay tuned for more posts coming up, you can make a whole set of coordinating jewelry to rock your outfit or give as a gift.
What you need to make a perler bead necklace
- Fuse bead pegboard (preferably 29×29, but other sizes can work)
- Fuse beads, assorted colors
- Fuse bead paper or parchment paper
- Iron (I like to have a mini one to keep for crafting)
- Perler bead jewelry template (download and print at the end of this post)
- Sewing needle (or a similar tool for poking holes)
- Jewelry jump rings
- Necklace chain or string
- Jewelry pliers
- Optional: tweezers
How to make a Perler bead necklace
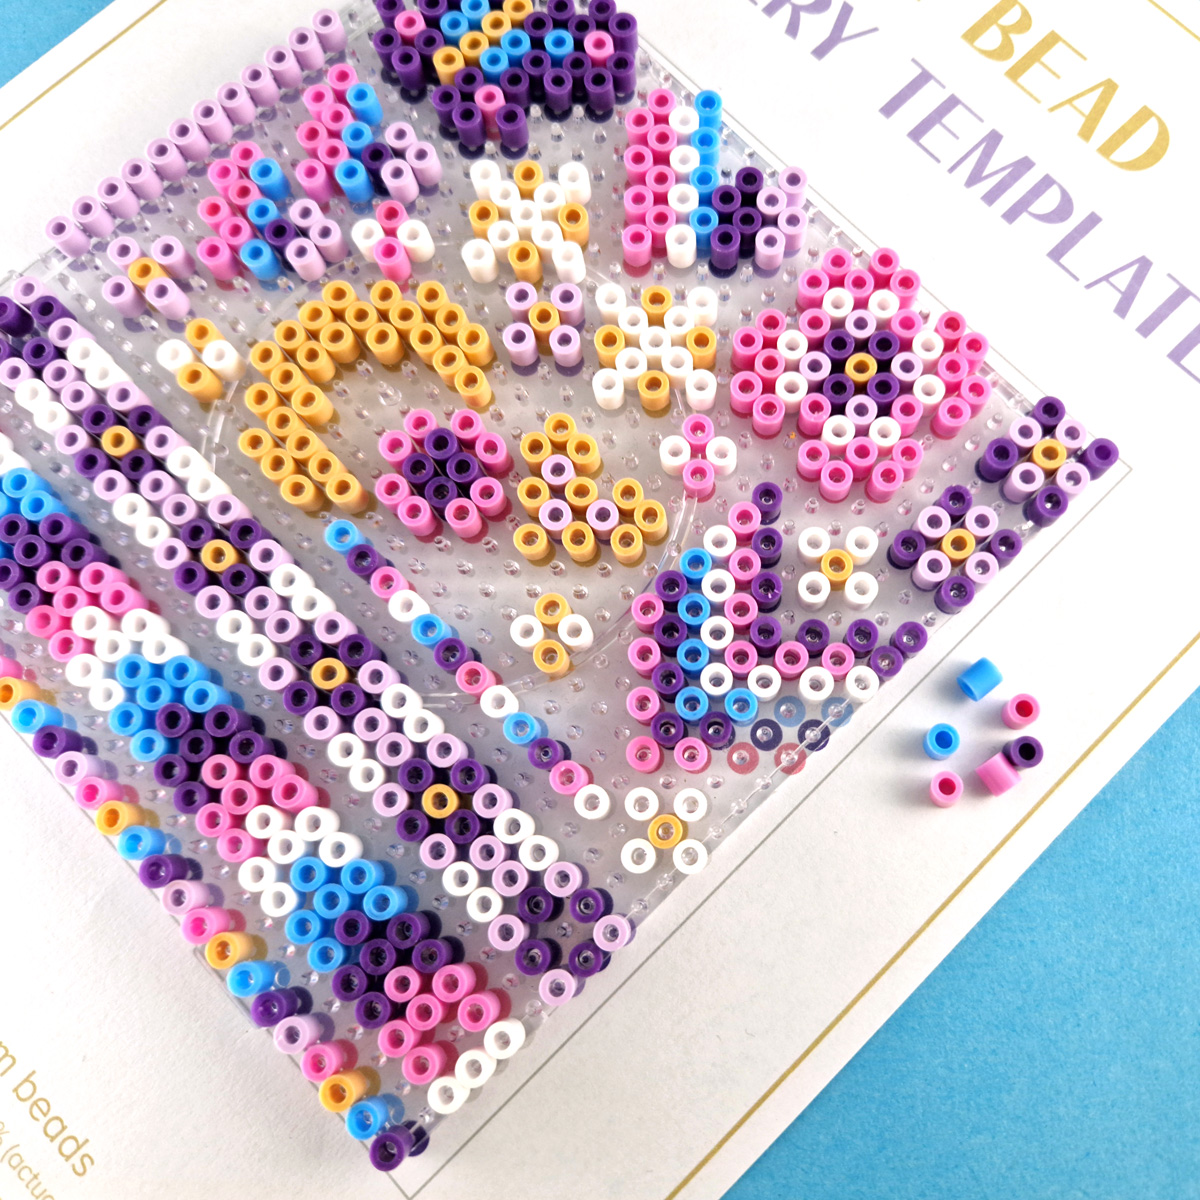
1. Print the template. If you’re using a clear (see-through) peg board, you can place it directly onto the template if you make sure to print it at 100% scale. Look at the designs on the template and choose which one – or more than one – you want to start with. The template includes designs for different types of jewelry – the necklace pendants are the larger ones.
2. Using the dots on the template as a guide, copy the design by placing beads onto the peg board. You can copy by matching the pattern, or you can lay your clear tray on top of the pattern sheet and place the beads directly on top of each colored dot as shown.
3. When all the beads are laid out, carefully cover them with a piece of fuse bead or parchment paper. It is helpful to cut the paper down to a size just a little larger than the peg board.
Preheat the iron to a medium setting, or the level indicated by the instructions on your bead package.
4. Place the iron carefully on top of the paper. Apply very gentle pressure while moving it in small circles to heat the entire project evenly. Do this for 30 seconds OR as indicated by the instructions on your bead package.
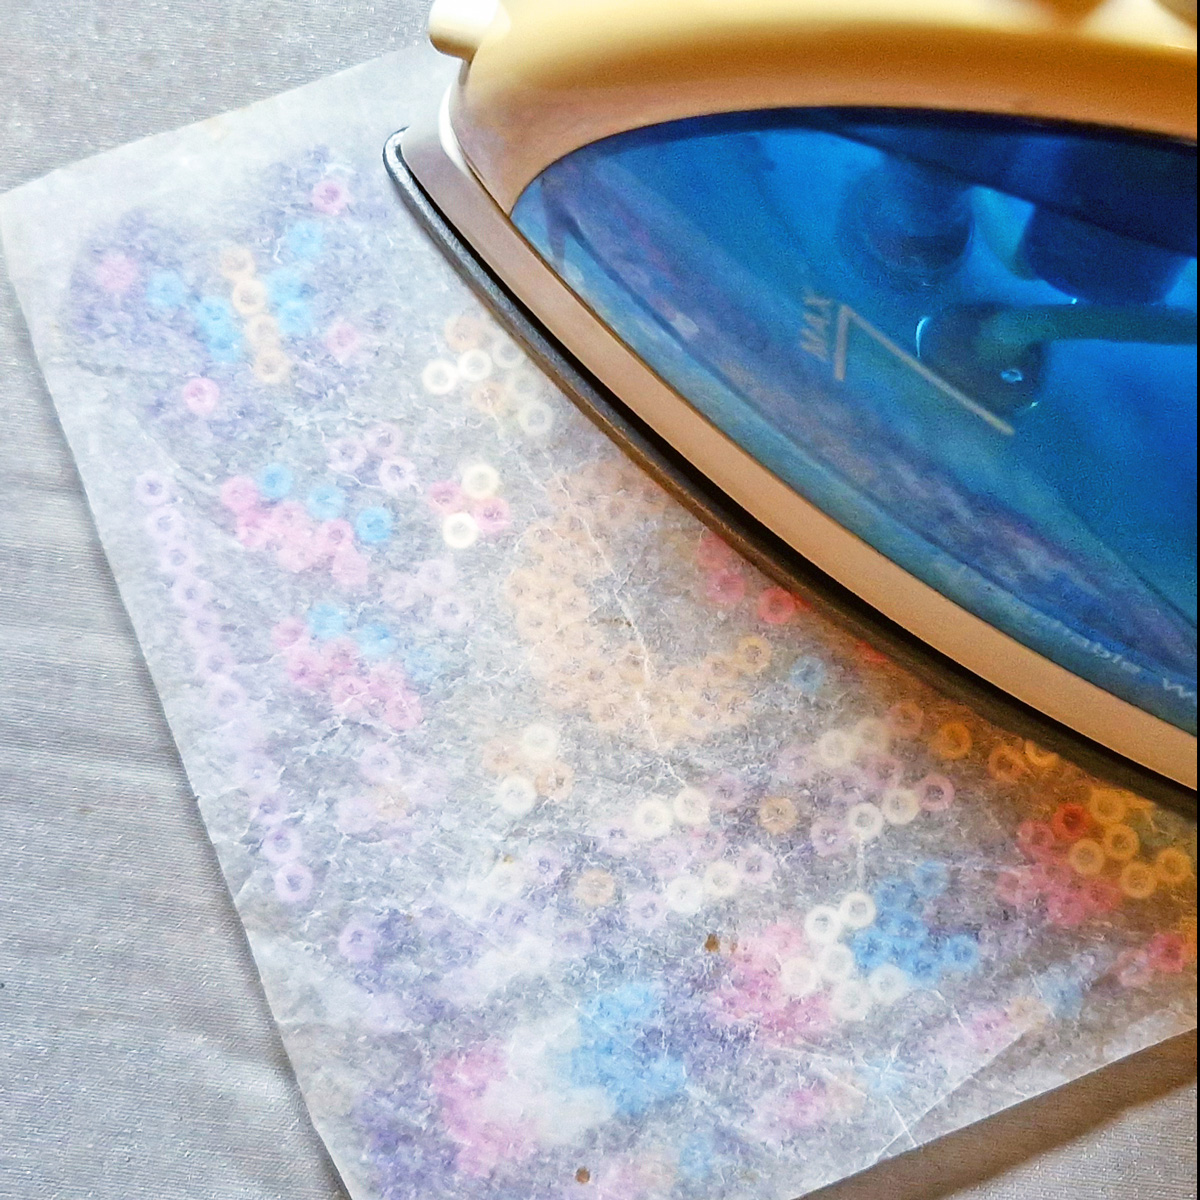
5. Gently lift a corner of the paper. Observe if the tops of the beads have become stuck together. If they seem loose, put down the paper and repeat the ironing for another 10 seconds, and check again.
When the tops of the beads are stuck together and smoothed out (you should barely see the holes in the beads, if at all), turn the project upside down and carefully lift off the peg board.
6. Cover the exposed side of the pattern with another sheet of the paper. Iron it a little less than the first side, just enough to make the beads stick together. This should prevent the design from getting warped. If it starts to curl anyway, place a book on top of it to flatten it as it cools.
While the design is still warm and flexible, use your needle or pin to re-open the holes you will use to hang the pendant. You can open one hole in the top center of a pendant, or you can open two holes on the top corners for a different style.
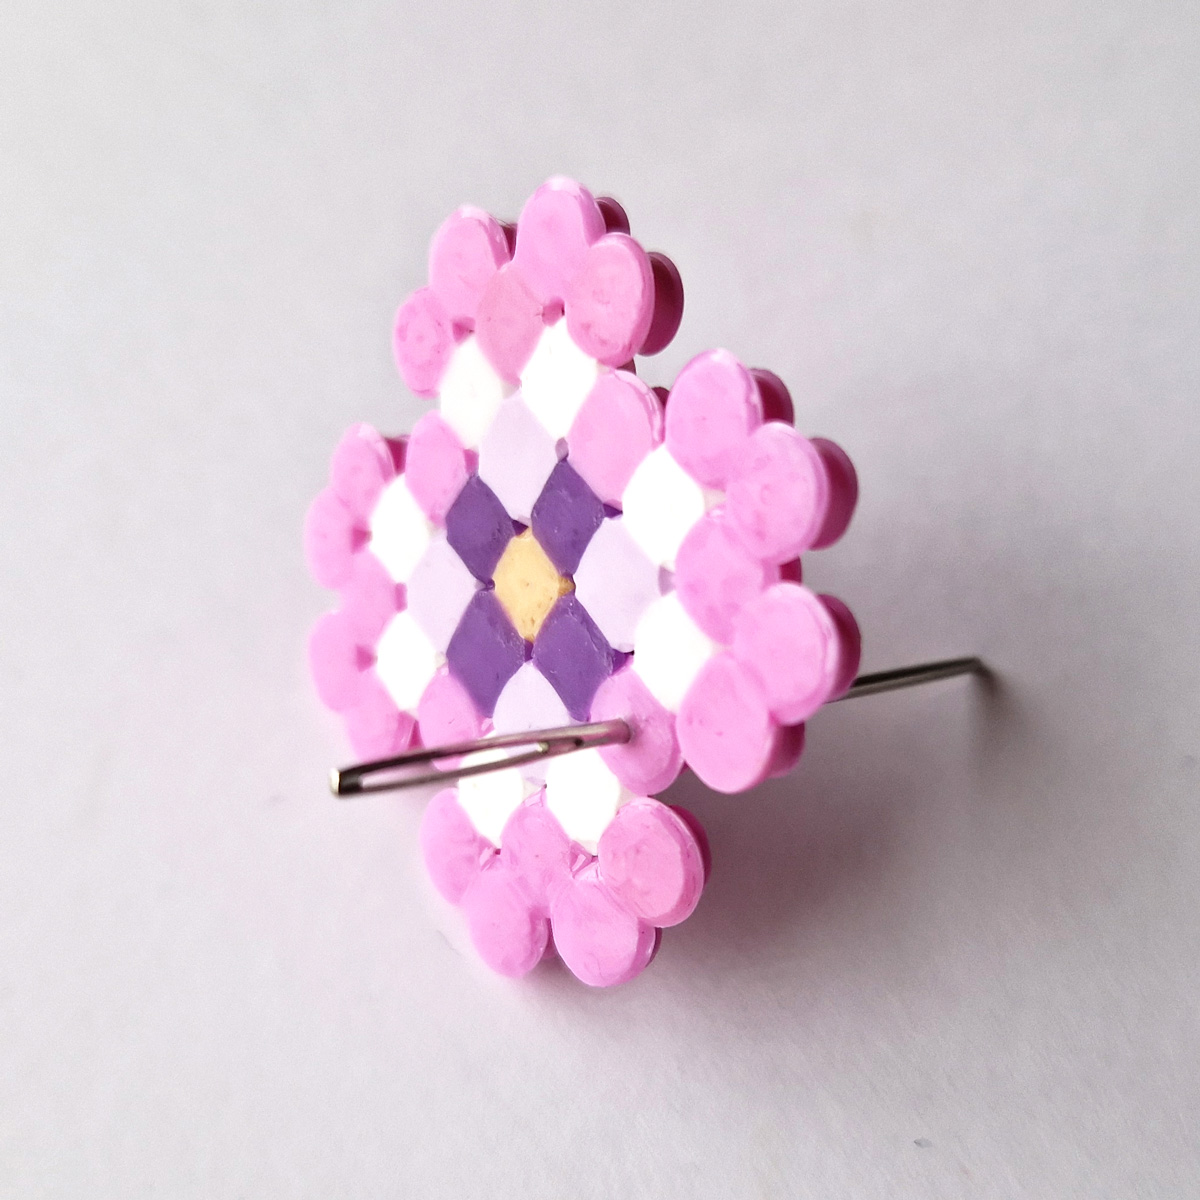
7. Use the pliers to poke a jump ring through each hole. Use the rings to attach the pendant to a chain, and then use the pliers to close the ring firmly.
You can also skip the ring and use a large embroidery needle to thread a string straight through the hole, but I prefer to use rings – they’re really easy to learn, and make the pendant hang straighter.
You’ve learned how to make a Perler bead necklace in all sorts of patterns and designs. Which jewelry would you like to make next? Comment below!
Download the free Perler bead necklace template below!
To download, fill out the form below. You’ll be signed up for our free newsletter – unsubscribe at any time in the footer of the emails. I respect your privacy and the law and won’t share your information with anyone.